Seedlings that sit on their seed leaves for weeks are usually held back below the soil. The common causes are a root zone that is too cold or too wet, fertilizer salts in the mix, fungus gnat larvae feeding on roots, or a mix with so little food that the seed’s own reserves have run out. Before you change anything, slide one seedling out of its cell and look at the roots. White, fine roots point toward slow growth, light, or feeding. Short, brown, or missing roots point toward cold, water, salts, or pests.
If you have been staring at the same pair of seed leaves for two weeks, you’re not alone, and the fix depends on which of those causes you actually have. Guessing is how a stalled tray turns into an empty one, because the two things most of us do first, watering more and feeding, are wrong for several of them.
Is it stalled, or just slow?
Count from the day the seed leaves opened flat, not from the day you sowed. A University of Maine Extension horticulturist told a gardener whose tomatoes were lagging that true leaves normally appear about ten to fourteen days after sprouting. Peppers run slower. A UC Master Gardener guide says their true leaves follow the seed leaves by a week or so, and that pepper seeds alone can take anywhere from one to six weeks to germinate. Other crops keep their own calendars, so find out what yours should be before you worry.
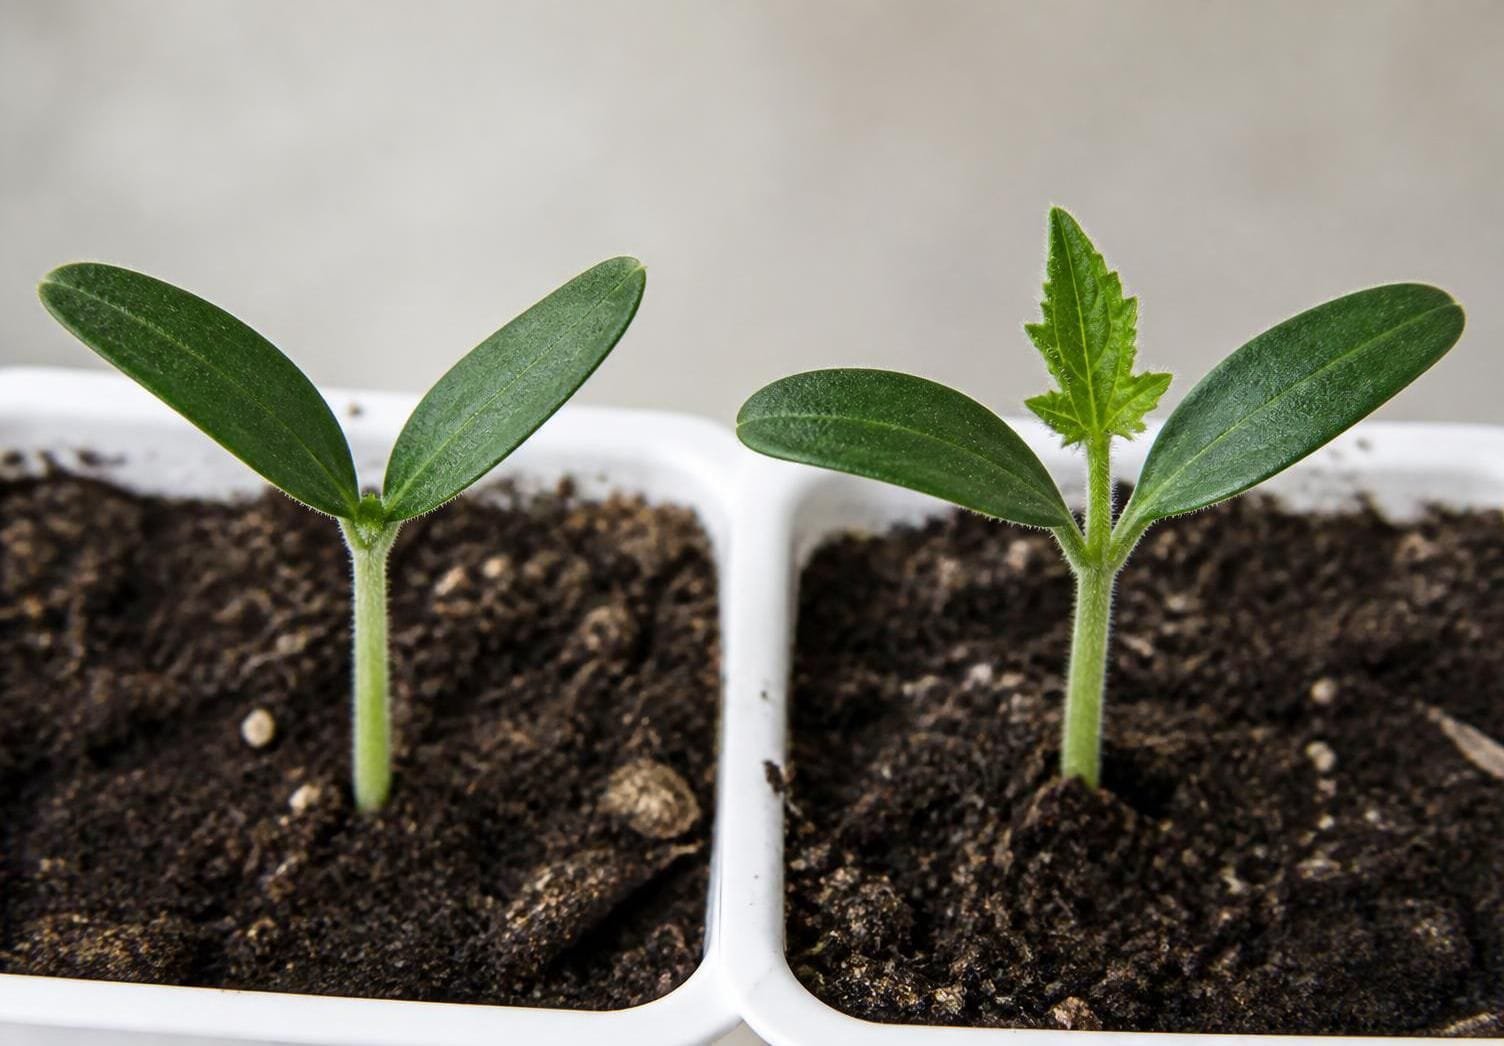
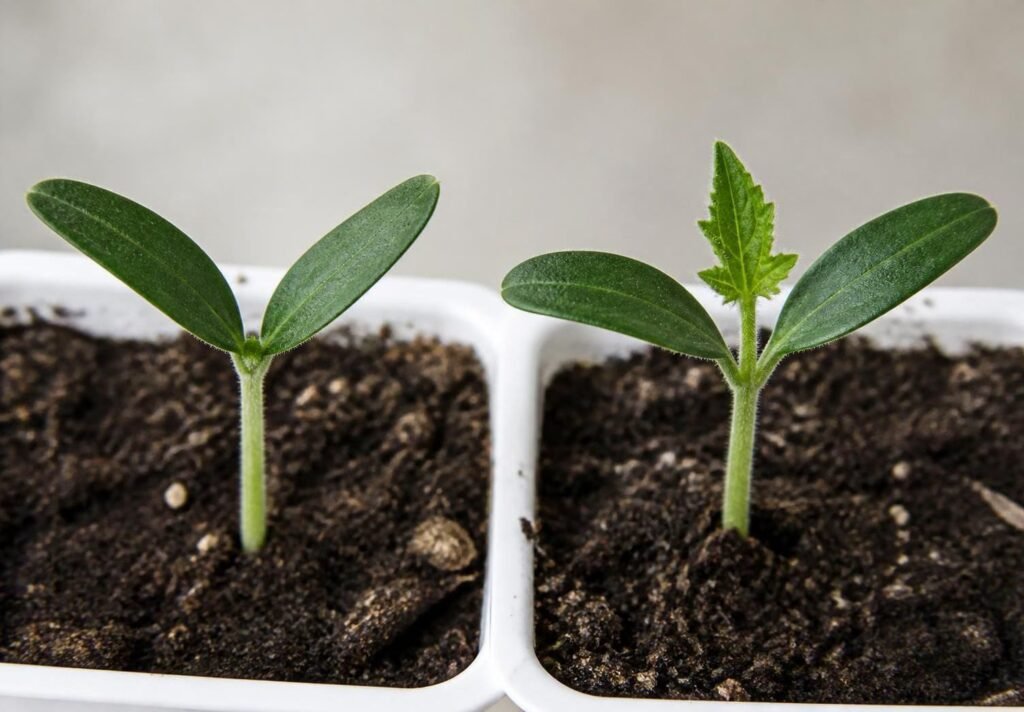
Then look at the center, right between the two seed leaves. A tiny bud or nub there is the first true leaf getting ready, which means the seedling is alive and simply slow. A flat, dry, or blackened center, with seed leaves that are yellowing or papery, is a worse sign. A seedling with a damaged growing tip often does not recover, so don’t plan your season around it.
Slide one seedling out and look at the roots
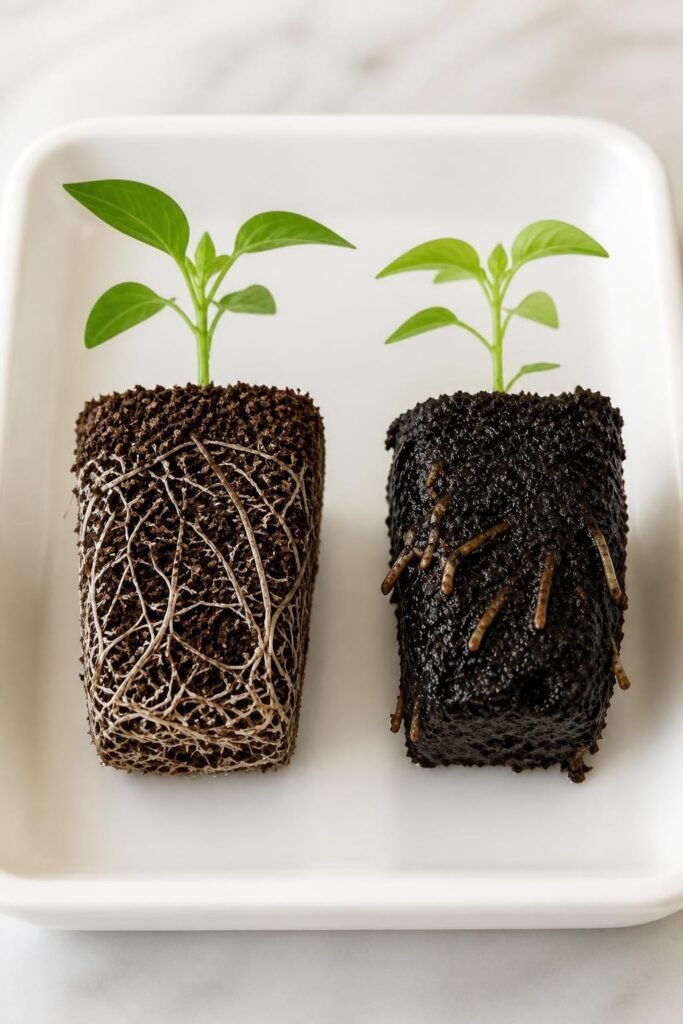
Most of us reach for the watering can or the fertilizer at this point. Hold off. Both can make a root problem worse, and the roots will tell you which way to go. Pick the weakest cell, squeeze it from the sides, and ease the plug out while you support it from below. Never pull on the stem.
- White, fine, branching roots, some reaching the edge of the plug: the roots are doing their job, so look at crop timing, light, and food.
- Short, stubby, brown-tipped, or mushy roots, or barely any roots: the trouble is in the root zone, so work through the cold, wet, and salt checks.
- Roots that look chewed, with tiny dark flies hovering over the tray: fungus gnat larvae are a likely culprit.
One honest limit applies here. Salt injury, rot, and cold can all leave you with a poor root system, and from a description or a photo they can look alike. The table below separates them by clues you can check at home. If two rows seem to fit, start with the fix that costs you nothing, such as letting the mix dry out.
Match what you see to the likely cause
| What you see | Likely cause | How to confirm | What to do |
|---|---|---|---|
| Roots white and fine, plant compact and green | Slow crop, weak light, or a mix with little food | Compare with the crop’s usual timing and look for a bud between the seed leaves | Give it a few more days, check lamp distance, and try one weak feed if the mix is a plain seed-starting blend |
| Roots short, brown, or mushy; mix dark and heavy for days | Mix too wet, root rot, or damping-off fungi | Cells feel heavy, water pools in the tray, drainage holes are missing or blocked | Let the surface dry, empty the trays, switch to a sterile free-draining mix, and resow if the roots are mostly rotted |
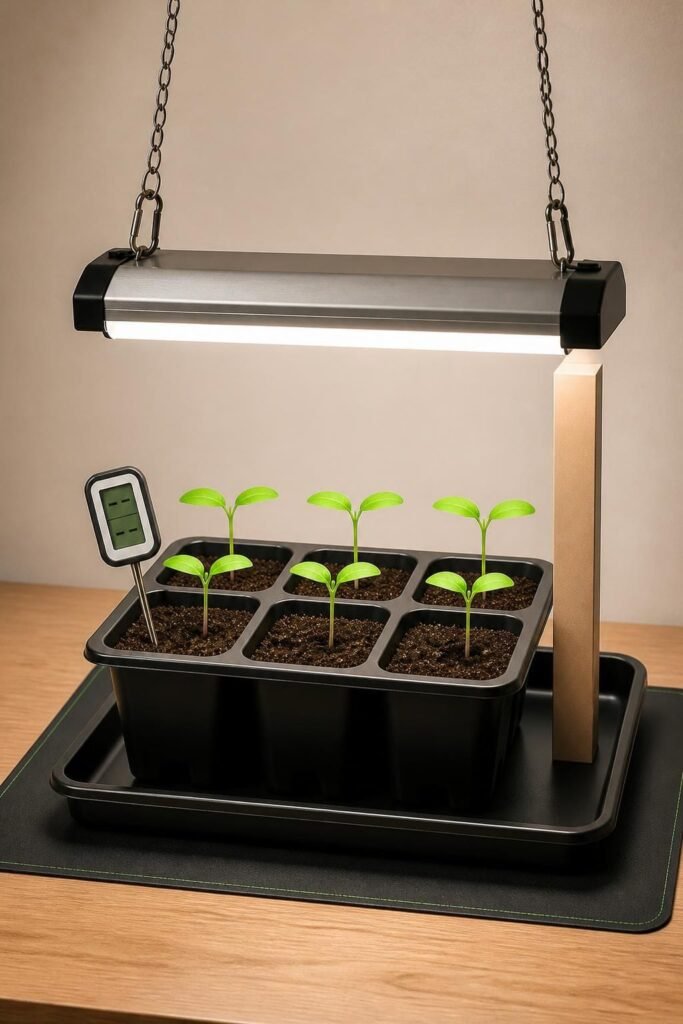
| Few slow roots; mix cold to the touch; tray on a sill or in a garage | Cold root zone | Probe thermometer pushed into the mix | Move off the sill and use a seedling heat mat, watching the temperature |
| Roots burned or barely formed; leaf edges scorched; you have fed repeatedly | Fertilizer salts | Feeding history, reused mix, or an EC reading if you own a meter | Stop feeding, flush slowly with plain water, and repot into fresh mix if nothing improves |
| Roots look chewed; tiny dark flies over the tray | Fungus gnat larvae | Yellow sticky card for adults, raw potato slice on the mix for larvae | Let the mix dry between waterings and follow the product label for any biological control |
| New growth cupped, twisted, or stringy; compost or manure in the mix | Herbicide residue | Pea or bean bioassay against a control pot | Use a known clean mix and keep the suspect compost away from sensitive crops |
When the roots look weak or missing
The mix is staying too wet
Roots sitting in soggy mix run short of air, and the same conditions favor damping-off fungi. Penn State Extension lists excess moisture, overhead misting, overcrowded flats, soil below 68°F before germination, and soil above 77°F after emergence among the conditions that favor it, and names Pythium, Fusarium, and Rhizoctonia as the usual fungi. In the same University of Maine answer mentioned earlier, the horticulturist suspected root rot or damping-off in tomatoes that were slow and yellowing. The advice was a sterile, soilless mix that drains readily, no water left standing in the trays, and a fresh start with new seed.
Check the weight of the cell. If the mix is dark and heavy days after watering, or water pools in the tray, ease off. Let the surface dry slightly between waterings, empty the trays, and make sure every container has drainage holes. A seedling whose roots have mostly rotted is rarely worth saving, and fresh seed in fresh mix usually costs you less time than nursing it.
The root zone is too cold
Room temperature and mix temperature are two different numbers. University of Minnesota Extension notes that the mix in a tray can run as much as 5°F cooler than the air, that a windowsill can be the coldest spot in the house at night and the hottest by afternoon, and that most seeds need consistently warm soil to produce strong roots. The same guide warns that cool mix invites seedling disease. Push a probe thermometer into the mix instead of trusting the room reading.
How much warmth to keep after sprouting is where the sources part ways. Penn State’s greenhouse advice is bottom heat that holds the mix at 70 to 75°F, while the UC Master Gardener pepper guide turns the heat mat off once the seedlings sprout. The right answer shifts with the crop and the room, so let the thermometer be your judge, and remember that Penn State also flags soil above 77°F after emergence as a disease risk.
Fertilizer salts are building up
This one hides well, because a seedling in salty mix can look green and well fed. Cornell Cooperative Extension vegetable specialists once reported significant crop loss to high-salt potting soils in a single spring, with stunted growth, slow or absent root growth, and burned leaf edges, and with pepper seedlings that failed to form roots at all. They also said they were still working out where the salts had come from. Seedlings that are just forming roots are hit harder than established plants, and the most common source in greenhouses is soluble fertilizer.
Here’s the kicker: feeding a stalled seedling is exactly what pushes the salt level higher. For reference, the same Cornell bulletin put an acceptable reading near 0.5 mmhos/cm in a 1:2 mix-to-water extract for seedlings and said readings above 1.25 can kill them. Few home growers own an EC meter, so go by history instead. Have you fertilized this tray more than once, reused old mix, or watered with a fertilizer solution? If so, flush the cells slowly from the top with plain water until it runs freely from the drainage holes, let them drain fully, and stop feeding. Cornell’s own remedy was thorough, regular leaching. If the seedlings have not perked up after a week or so, repot into fresh mix.
Fungus gnat larvae are working the roots
Small dark flies hovering over the tray and a mix that never seems to dry are the giveaways. University of Georgia Extension explains that the larvae live in moist organic mix and may feed on roots, which stunts seedlings in particular. Let the surface dry between waterings, start with fresh sterile mix, and use yellow sticky cards to catch the adults. A slice of raw potato laid on the mix will draw larvae if you want proof. Biological and chemical controls exist, so follow the product label and check what is permitted where you live.
When the roots look fine
White, healthy roots mean the seedling is alive and working, so the question becomes what it is short of. Minnesota’s extension guide says seedlings run on seed reserves early and don’t need fertilizer until they have several sets of true leaves, and that seedlings in a soilless mix benefit from a weak general-purpose water-soluble feed at one quarter strength, once a week. The same guide asks for fluorescent or LED lights within about four inches of the seedling tops, with two inches ideal, and for twelve to sixteen hours of light a day with a dark period at night.
The mix has no food
A Minneapolis gardener wrote to Ask Extension in March 2025 about peppers, brassicas, and onions that sprouted well and then went still. In earlier years true leaves had arrived seven to fourteen days after the seed leaves formed, but this time nothing came after two weeks, and the seed leaves were starting to yellow. The seedlings were green and compact, not leggy, with lights about four inches above them, and the gardener watered only after the top layer dried. A homemade mix of peat, vermiculite, and perlite had stalled them one year and a potting soil and perlite blend the next, and the previous year’s seedlings recovered after a move into a dedicated seed-starting mix. The volunteer who answered pointed out that seed-starting mixes carry no nutrients, so seedlings have to be moved into something richer as they outgrow their cells.
We can’t tell from that thread whether the new mix helped through texture, drainage, nutrients, or something nobody measured. That is the honest limit of diagnosing from a description, and it is why the root check comes first. If your roots are healthy and the mix is a plain peat-based blend, a weak feed is a fair experiment. Use a fertilizer made for seedlings or a general-purpose water-soluble one, dilute it well below the label strength, and give it about a week. A tiny bud forming between the seed leaves means you guessed right. No change in a week? Go back to the roots and the temperature.
The light is weaker than it looks
Weak light usually announces itself as stretching, and the Minneapolis seedlings were not leggy, so light alone is a less likely explanation for a compact, green, motionless seedling. Still, measure from the plant tops to the lamp rather than guessing. The four-inch figure belongs to the fluorescent and LED tubes Minnesota describes, and other fixtures, especially high-intensity lamps, are built to hang higher, so follow the maker’s distance for yours. Then run the light for the hours the plant needs and switch it off.
Compost or manure is in the mix
If any new growth does appear and it comes out cupped, twisted, or stringy, think about herbicide residue. Oregon State’s Small Farms Program describes pasture and hay herbicides such as aminopyralid and clopyralid that pass through animals, stay active in manure and compost for a long time, and injure sensitive crops, with tomatoes, peppers, peas, beans, and lettuce on its list. The same bulletin cautions that disease, insects, or drift can cause similar symptoms. The home test is a bioassay: fill small pots with a 2:1 mix of the suspect compost and commercial potting mix, fill control pots with potting mix alone, plant peas or beans in each, and watch for two to three weeks. If the controls thrive and the test pots do not, the compost is suspect. Until you know, keep it away from your seedlings.
What not to do
- Don’t fertilize before you have looked at the roots. Burned roots can’t use it, and the extra salts make the damage worse.
- Don’t water more because the seedlings look pale or still. A mix that stays wet is one of the causes above.
- Don’t move a stalled seedling into a big pot. A large volume of mix around tiny roots tends to stay wet longer.
- Don’t dig up the whole tray to check. Sacrifice one weak seedling, learn what it shows, and leave the rest alone.
Will they catch up, and when to start over
Once you have fixed the cause, give it about a week and look at the center between the seed leaves again. A new bud or a tiny pair of leaves means the seedling is recovering. Seed leaves that yellow after true leaves have taken over are normal, but yellowing before any true leaf shows is the stress sign worth acting on.
The extension sources we reviewed do not report controlled trials on how fully stalled seedlings catch up, so treat recovery as likely when the roots were healthy and uncertain when they were rotted or burned. If a tray shows nothing after two weeks of corrected conditions, resowing in fresh seed-starting mix is often the faster route. Keep a few survivors going as a comparison, since they will show you whether the new setup works.
Quick answers
Should I fertilize seedlings that only have seed leaves?
Usually not. Look at the roots first. If they are healthy and the mix is a plain seed-starting blend, one weak feed is a reasonable test. If the roots look burned or you have fed recently, flush instead.
Why are the seed leaves turning yellow before any true leaves show?
Seed leaves are temporary and fade once true leaves take over, so yellowing at that stage is expected. Yellowing before any true leaf appears points to stress, most often at the roots, so run the root check.
Can I move seedlings that have no true leaves yet?
Only when the mix itself is the problem, such as soggy or salty mix. Slide the plug out whole, support it from below, and set it into fresh seed-starting mix at the same depth. If the roots look fine, leave the seedlings where they are.